DIY Cake Smash Photoshoot
- Camila Gonzalez

- May 29, 2020
- 3 min read

I can’t believe my baby girl is already a one year old!!!
I believe a cake smash photo shoot is one of the best ways to celebrate your little ones first birthday, because both of you get what you want; babies only want to eat and play and we as mommies only want to capture every little detail of our precious babies. This is also a really fun way to introduce babies to their first real taste of sugar!
Some of you may ask What’s a cake smash?
A cake smash is a fun way to celebrate a baby’s first birthday by basically letting them do whatever they want with the cake... they’re going to destroy and eat the cake while you take fun pictures of them.
Items I used:
*You can shop all of the products by clicking on the photo (not sponsored).
1. Backdrop: Muslin backdrop. Many photographers use this background for cake smashes, because it provides a clean colored background. I really liked it and it’s only $18. Before the cake smash I put the backdrop in the dryer to get rid of the wrinkles.
2. Backdrop stand: this really helped me to keep the backdrop centered and steady I also used white duct tape for the floor so the backdrop wouldn’t move while I was taking the pictures. You don’t have to use a backdrop stand you can also tape it to the wall.
This is not the one I used but I tried to find a really similar to mine.
3. Softbox Lighting Kit: As a photographer i really think lighting is one of the most important things in order to get good picyures. This is not the one I used but I tried to find a really similar to mine.
4. Camera: I used a canon Rebel T6 with a 18-55mm lens, however you can use any camera you owe, even your phone if you like.
5. Decor: You can really get any decorations you like but I really like clean and floral decorations.
So this is what I used to decorate:
•Eucalyptus garland:
•Wood Crate: I painted mine white. this is not the one i used but i tried to find one really similar to mine.
•Cake topper:
•Natural flower petals.

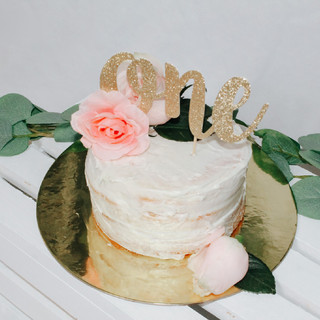
6. Cake: you can buy any cake you like but I wanted to share with you step by step how I baked my cake!
First of all this is what I used:
*You can shop all of the products by clicking on the photo (not sponsored).
* Betty Crocker super moist french vanilla cake mix.
* Betty Crocker vanilla rich and creamy frosting.
*wilton cake pan 6 x 2in.
* Publix silicone spatula.
*Flowers and cake topper as decoration.
Baking time!
•Follow the instructions on the back of the box on how to make the mix. (Divide the mix in 3, so you can get three layers of cake).
•Pour the mix on the round pan (don’t forget to grease the pan first).

•Bake at 350° for 20 minutes. You’ll know the cake is done when a toothpick comes out clean.
• Cool to room temperature.
• Level any uneven layers with a serrated knife if necessary.

•Get the first layer on the serving plate ( I placed mine on a random plate and then had to transfer the cake to the serving plate and it wasn’t a good idea lol).
•Spoon some of the frosting directly on top of first layer; using the spatula, spread the frosting evenly over the top.

•Place the second layer on top of the first layer and repeat until all the layers have been used up.

•Lightly frost the entire cake, use the spatula to scrape excess frosting off.

•Place the cake in the freezer to allow the icing to set.
•Decorate!!

Click here to see the full gallery
Baby is wearing
Headband


Comments